How To Get That Salon Finish Mani or Pedi
This may seem like a pretty simple post as we all know the basics of painting our nails, but it literally makes my eyes bleed when I see Instagram pics of girls showing off their painted nails with flooded cuticles/chipped nails. No, no, no! Keeping your nails looking good and healthy doesn’t need to take long at all – even if it’s keeping them polish-free and just looking well-manicured.
So this is a basic 101 on how to make your nails look even half decent. As superficial as it may sound, well-manicured hands and toes really do matter, trust me on this one. Try following the below steps:
Firstly – set aside time to do your nails. It does take time and the drying time is longer than most nail polishes claim! I like to do mine early evening after a bath when my cuticles are soft and I can settle down to a good movie or eat dinner whilst letting my nails dry properly. A good Quick-dry spray will help you with this too.
Step One: Prep the Nails
Do all your prepping first. Start with cutting your nails (I use a nail clipper as it helps me get my nails short and square – how I like them plus it’s quick). Then finish with filing gentle (in one direction) to soften off any sharp edges.
If you want to do cuticle work, do it now. Then finish off this step with swiping some nail polish remover over the entire nail – this will remove any oils that may prevent the polish from adhering to the nail properly. This is the most NB step.
Then follow with one thin coat of your base coat of choice. Be sure to cover the entire nail. See below painting instructions.
Step Two: Painting
I know that this takes practice and loads of people battle to get this right, but there are a few basic things here that can help you. Start by working on a surface that is stable and secure. I always do mine at my dining table as there is plenty of space.
Firstly, avoid a gloopy, 5 year old polish. There are loads of great brands that are very affordable, so be sure that your nail polish is in good condition. Always store your bottles in a cool area – the fridge works well if you feel that way inclined 🙂 Read my tips on keeping your polishes fresh here. Brands wise, there are too many good one’s to mention in this post. Look at my Pinterest board for my best brands and colours.
Make sure your brush is well coated in polish, but not too much as this will result in dripping. The best is to remove polish off the one side of the brush.
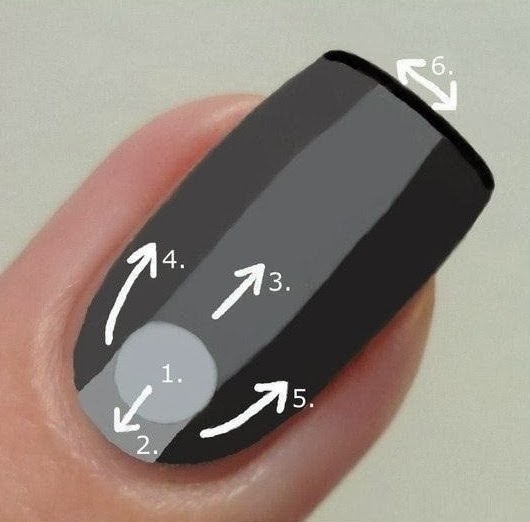
Start by firmly placing the brush in the centre of your nail plate, moving up to create a moon shape that mirrors the cuticle shape. Rather keep a gap here that try and get too close. This is when cuticle flooding will happen and there’s no going back after your red polish has flooded your nails!
After a 5 minute break, you can apply your second coat. This is usually enough for a solid colour, but if you want a very opaque look and your polish is quite transparent then 3 coats may do the trick.
Leave this to dry for another 5 minutes (if you have the time).
Step Three: Finish off
Finish off with a top coat. This is vital in protecting the nail polish colour and longevity. It also adds shine which is what will make your nails have that salon finish. The top coat can be applied like your actual polish but be sure to seal the nail off, as seen above (step 6). Well painted nails should last about 5 – 7 days. When they do chip, don’t try and paint over them – rather just remove and re-do them.
On a side note…
If you don’t have time to actually paint your nails and don’t want to part with money for your usual salon mani and pedi, then you are not going to be let off the hook. Maintaining well-manicured nails can simply mean hydrated cuticles, short, clean and neat nails with a basic clear coat over them. This will only need to be re-done once a week and will take 2secs. Natural, healthy nails also look great!
A good diet will also help in keeping your nails looking good – you can read my tips here.
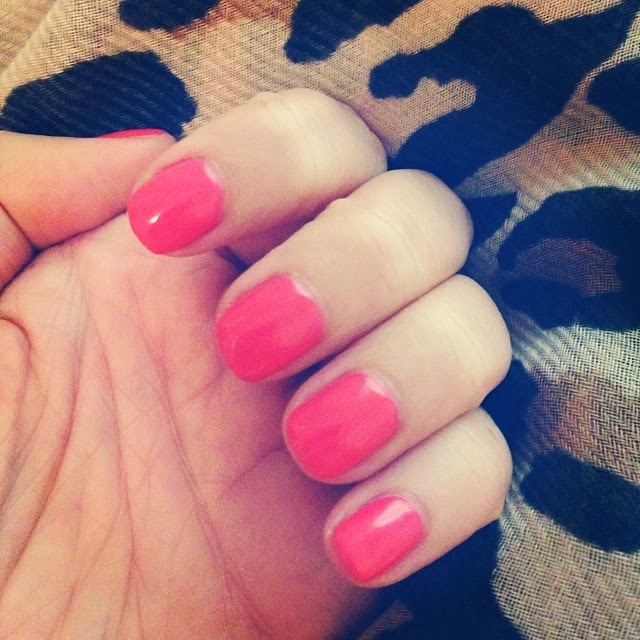
Image source


Leave a Reply
Want to join the discussion?Feel free to contribute!